Important Development Notes:
- Staff listings (for the Contact Us section on the right sidebar) are fully available.
- Pages automatically publish. After you save, you can access them at the "Your Content" menu at the top of the page.
- If you unpublish a page, you will no longer see that page in your list of content.
- Sitemap provides guidance on assigning categories and subcategories.
- Anchor text instructions
- Review pages for accessibility features
Internal links to other pages
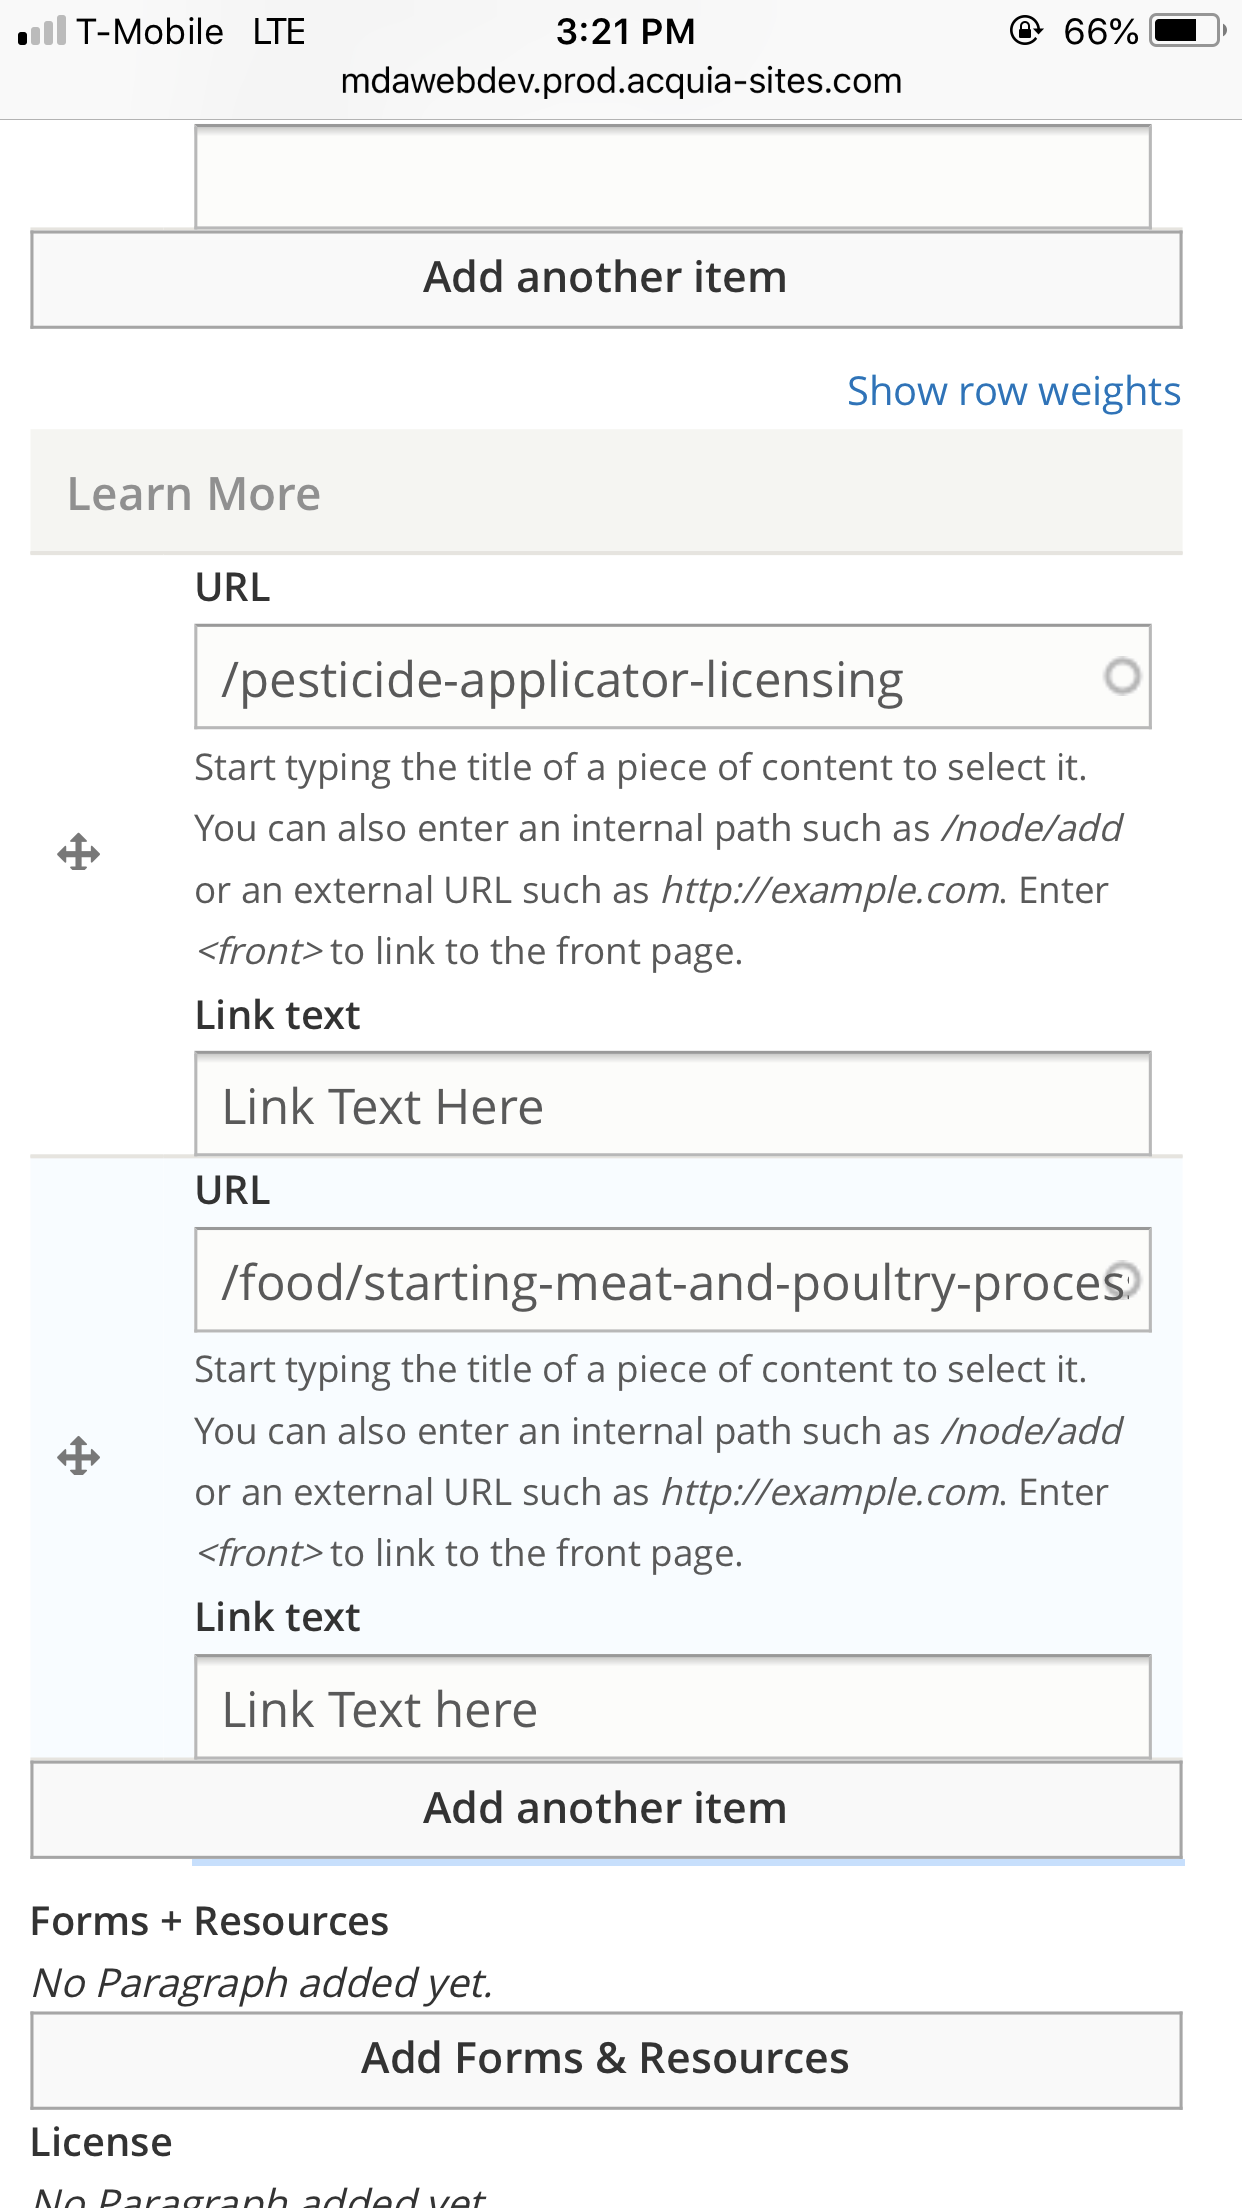 To link to other pages on the MDA site, copy the url starting from right after the .com including the slash /.
And paste it in the url field and type down the link text in the link text field. Check the attached image example. The original url was: http://mdawebdev.prod.acquia-sites.com/pesticide-applicator-licensing. The URL copied was /pesticide-applicator-licensing.
Header Images - Inside pages
Header (Hero image at top of page) is 1445 px wide x 70 px high. You may upload an image that is more high, and the CMS will crop the image from the bottom. There is a dark blue overlay of 90% that is automatically added.
Copy from a Microsoft Word document
To view videos fullscreen, click the title on the video to view on YouTube.
Tip: Change the "text format" box to Restricted HTML for proper copy + paste workflow.
Input Form Fields + Right Sidebar Content
Where the editing form fields display on the front end & how to input content in the right sidebar and learn more sections.
Formatting Text
Understanding default/normal body paragraph and heading styles. Upload image, file in body area.
Tables
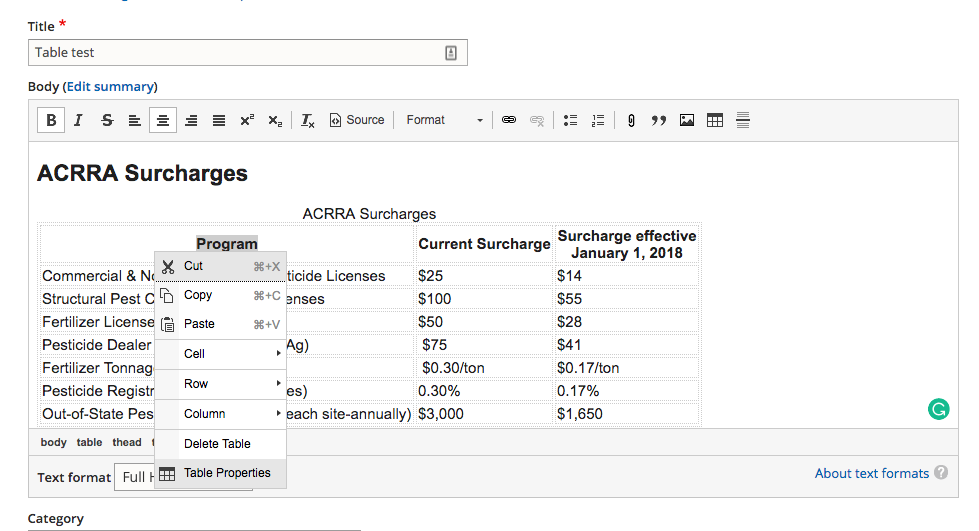
Use tables infrequently, and consider if a table is really needed. When using tables, copy/paste the table into the editor. Then save the page. Reopen the page, then right click on the table and select "Table Properties".
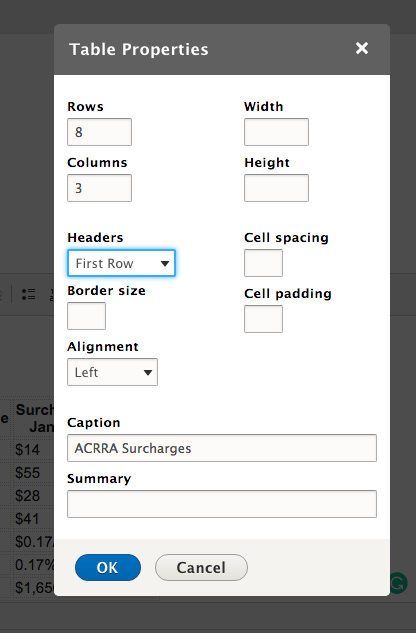
Reopen the page, then right click on the table and select "Table Properties." In this popup:
- Add a caption and assign Headers as a row, column, or both. (Figure 1, 2)
- To add rows, columns or cells to the table, right-click the table. (Figure 3)

Upcoming Topics:
Anchor Links
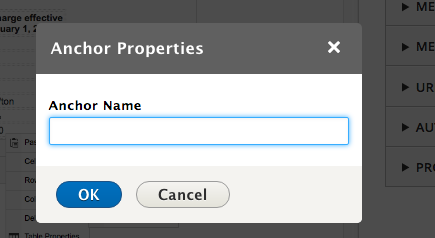
To create an anchor link, first, highlight the text where the link should anchor. Next, click the Anchor button (flag icon) in the toolbar.
In the Anchor Properties popup window, give your anchor a name and click OK. Your anchor is set.
To link to a previously-set anchor link, highlight the text, click the Link button from the editor's main toolbar.
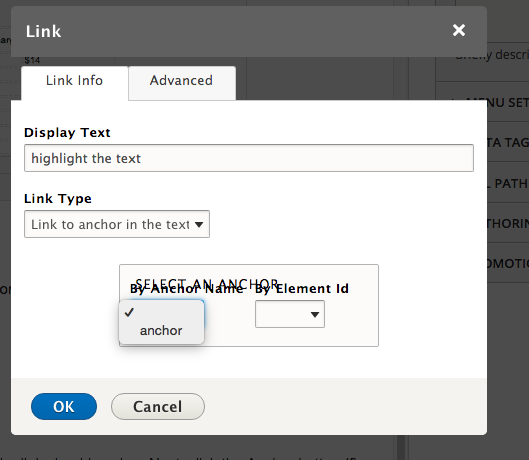
In the Link popup, from the "Link Type" field drop down, select "Link to Anchor in the Text." Then, in the Select an Anchor area, click the drop-down in the "By Anchor Name" field. Any anchor link available to anchor on the page will display. Select your anchor name and click Ok. Save the page and test your anchor.
Create Gray Submenu Family
Add License Page
Edit a Subcategory Page
Image thumbnail sizes on a subcategory page are set at 360 px wide x 240 px high.